

TL;DR #
A modular packaging platform built on three interchangeable component tiers — graphic, material, and structural — can reduce per-SKU customization cost by enabling shared base tooling across product variants while still delivering brand differentiation at the individual unit level. For buyers managing small-run orders (typically under 500 units per variant), this architecture eliminates the penalty of full custom dieline development on every iteration. Evaluate any supplier’s platform-ready tooling inventory before committing to sampling — it’s the single biggest lever on your landed cost at low MOQ.
Overview #
Most procurement teams approach small-run custom packaging as a straight cost-per-unit problem, and they’re wrong to do so. The real cost driver at low volumes isn’t print or material — it’s the proportion of non-recurring engineering (NRE) charges, including dieline development, die-cutting tooling, and plate origination, spread across a short run. Research conducted at multiple design and manufacturing institutions, drawing on systematic classification of existing generic packaging architectures and a documented design platform trial across multiple product configurations, provides a useful framework for restructuring that cost model. The study evaluated three distinct universal packaging typologies and four customization methods against production feasibility criteria, giving buyers a concrete vocabulary to use when scoping OEM packaging briefs.
The finding that matters for procurement: when you separate the base structural module from the surface decoration layer, you can reuse tooling across multiple SKUs and only pay for customization at the graphic or component level. That’s not a new idea in rigid box manufacturing, but it’s rarely applied systematically at the MOQ ranges most SME buyers are working in.
Three Universal Packaging Types and What They Cost to Customize #
The source research classifies universal packaging into three distinct typologies. Understanding which type you’re ordering — and whether your supplier has pre-built assets in each — directly affects your per-unit cost and lead time.
Type 1: Graphic-Universal (Decoration-layer customization)
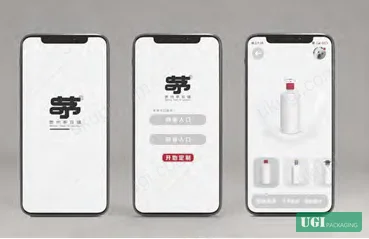
The base structure and material are fixed. Only the visual surface — trademark, typography, layout composition, color — changes between product variants. This is the lowest-cost customization path because die-cutting tooling and structural forming costs are fully shared. The constraint is that all variants must fit within the same physical form factor. In practice, this means a single dieline can service 8–12 SKUs if the brand family is architected correctly from the start. Label substrate options for the customization layer include thermal paper, coated art paper, PVC/PET film, kraft paper, and laser holographic self-adhesive stock — each with different surface finish compatibility and minimum order thresholds.
Type 2: Material-Universal (Substrate customization)
The structural geometry is standardized; the material specification changes across variants. This is where buyers frequently overspend. A single box dieline can be produced in 300gsm SBS, 350gsm coated duplex, or 2mm greyboard-plus-wrap depending on the price tier of the product inside — but only if the structural design was dimensioned for material interchangeability from the start. The five material selection criteria outlined in the research (protection, compatibility, circulation environment/shelf life, economy, and environmental compliance) map directly onto the five questions a competent supplier should be able to answer before sampling.
Type 3: Structural-Universal (Form factor customization)
Sub-components are independently designed, manufactured, and assembled. The total package is reconstructed from a library of tested modules — bottle closure sub-modules, outer gift box forms, inner tray configurations, exterior attachment components (hang tags, belly bands, label inserts). This is the highest-flexibility, highest-tooling-investment path. It is also the only approach that genuinely scales to mass personalization at low run sizes, because the NRE cost is absorbed once across the platform rather than on each order.
| Packaging Type | Customization Layer | Tooling Reuse Potential | Minimum Effective Run | Primary Cost Driver |
|---|---|---|---|---|
| Graphic-Universal | Surface graphics / label only | High — single dieline, multiple artworks | 100–300 units per variant | Plate origination or digital print setup |
| Material-Universal | Substrate and finish | Medium — same dieline, different materials | 300–500 units per variant | Material specification and run changeover |
| Structural-Universal | Component modules | Very high — modular asset library | 50–200 units per variant (per module swap) | Initial module tooling investment |
Looking for a manufacturer that meets these specs? Get a free sample — MOQ starts at 500 units.
Four Customization Methods for Low-MOQ Packaging Orders #
The research identifies four practical methods for achieving brand differentiation on a universal packaging base. Each has a specific cost profile and production requirement. Here’s the honest breakdown:
Method 1: Brand Borrowing
A regional or collective brand identity system provides the base template. Individual merchants purchase the template and apply it without structural redesign. Advantage: immediate availability, near-zero design lead time, low unit cost through shared production volume. Disadvantage: homogenization is structurally guaranteed as usage grows. This method solves a real problem — buyers who need packaging now at minimum cost — but it is not a brand-building tool. Use it for commodity SKUs, not for anything where shelf differentiation matters.
Method 2: Module Replacement
Specific zones within the template are designated as replaceable. There are two physical implementations:
- Direct adhesive application: Blank zones on the base package are filled with custom-printed self-adhesive labels. Brand logo, product name, and variable data are printed on-demand and applied before or after box assembly. This is the fastest and cheapest route to a “custom” package — the base box can be stocked in bulk and personalized at point of fulfillment.
- Structural inlay: A die-cut aperture in the outer structure accepts an interchangeable decorative inlay card or label. The inlay carries brand identity information and snaps into position mechanically. Higher visual impact than adhesive application, but requires aperture tooling to be cut into the base dieline from the start.
Honestly, most buyers underestimate how much mileage they get from well-designed blank zones. A 40mm × 80mm logo window on a standard outer carton, combined with short-run digital label printing, can deliver 15–20 effectively distinct SKUs from a single base box run. We’ve seen this approach collapse per-unit costs by 30–40% vs. full-custom on runs below 500 units.
Method 3: Component Addition
Auxiliary decorative or functional components are added to the base package post-production. Hang tags, belly bands, wax seals, ribbon pulls, secondary label overlays. Each component is designed, produced, and attached independently. This method adds layered visual complexity without changing the base structure — it’s particularly effective for gift packaging where the unboxing experience matters more than the box form itself.
The production logic is important: components must be designed with explicit attachment methods defined upfront (string, adhesive tab, slot-and-tab, heat-seal band). Vague attachment specifications are one of the most common sources of QC failure at goods-in — we’ve seen three out of six initial samples in a supplier qualification round fail acceptance specifically because hang tag attachment method wasn’t specified in the brief and each factory interpreted it differently.
Method 4: Digital Content Substitution
Non-physical customization via QR codes, AR triggers, NFC tags, or variable digital print overlays. The physical package is universal; the consumer experience is personalized through linked digital content — brand story, product provenance, promotional interactions, 3D visualization. This is the fastest-growing segment in the premium spirits and gift packaging categories, and most procurement teams don’t realize that ISO 15415 (2D barcode print quality) and GS1 General Specifications have both been updated to address on-package digital trigger requirements. If your brief includes QR or AR functionality, verify that your supplier’s print process meets the minimum contrast ratio and quiet zone specifications in those standards — otherwise field scan rates drop significantly.
Platform-Based Design Workflow: Production Requirements and MOQ Implications #
The research outlines a four-stage platform design process that has direct implications for how you structure an OEM brief:
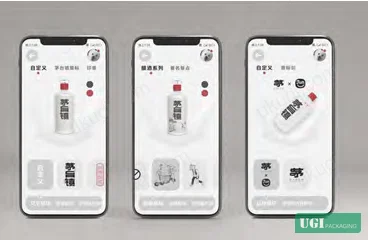
- Functional deconstruction — Define the product’s packaging requirements by type and function. Normalize structural forms against standard production specifications. This stage determines whether your packaging can be modularized at all, and which modules are candidates for shared tooling.
- Primary module templating — Establish the master structural form: outer gift box geometry, inner container configuration. At this stage you are making the tooling investment decision. A FEFCO standard outer carton style (e.g., FEFCO 0201, 0215, 0427) costs significantly less to tool than a bespoke form — and for most products, a standard style with custom dimensions serves the same functional purpose.
- Sub-module templating — Design the variable components: closure types, graphic panels, exterior accessories. Each sub-module should be independently producible and stockable. This is where lead time flexibility lives — if sub-modules can be produced on digital or short-run equipment, you can reorder them in quantities as small as 100–200 units without triggering a full production restart.
- Module recombination and output — Select and recombine modules to generate the required packaging variants. In a properly built platform, this step should take hours, not weeks.
The efficiency gain is real but it requires upfront investment in platform architecture. Buyers who try to retrofit modularity onto a package that was designed conventionally will find that the sub-module boundaries don’t align with production-efficient cut lines, and the cost savings evaporate. Get the modular brief into your OEM partner’s hands before the structural design is finalized — not after.
Practical Guidance for Buyers #
If you’re managing packaging for a product line with 5 or more SKUs at volumes under 2,000 units each, the universal packaging platform model is worth a hard look at your next RFQ cycle. The key parameters to negotiate are: shared dieline tooling amortized across SKUs (not charged per-variant), blank-zone specifications that accommodate your label or inlay customization format, and sub-module attachment specifications defined to a physical tolerance, not just a description.
Material selection at the module level should be validated against ISO 11607 if your product has regulatory packaging requirements, and structural performance should be verified against ISTA 2A transit testing protocols before finalizing the base module tooling — especially if your logistics chain includes cross-border air freight where pressure differential causes delamination in certain board grades.
At ukugi.com, we work with international brand owners and product managers across North America, Europe, and Southeast Asia who are running exactly this type of multi-SKU, low-MOQ program — our OEM process is built around modular tooling libraries for folding cartons, rigid boxes, and premium gift packaging, so the platform architecture described here is something we implement operationally, not just theoretically. Need a custom formulation or sample? Request a quote from our team →
Technical Verification Questions #
Key technical points to verify when evaluating any supplier in this category (including us):
- What is your current primary module tooling library for outer carton forms — specifically, how many FEFCO-standard configurations are available for immediate dieline release without new tooling charges, and what is the dimensional tolerance (±mm) on modular sub-module fitment?
- For module replacement via direct adhesive application: what is the specified peel adhesion strength (N/25mm) of your recommended label substrate, and has it been tested against the base substrate under the temperature and humidity conditions of your typical shipping environment?
- Can you provide documentation showing that your blank-zone positioning on standard graphic-universal templates is registered to ±0.5mm or tighter — and what is the production process that controls that registration (mechanical stop, optical registration, or manual alignment)?
- For structural-universal packages with inlay apertures: what is the dimensional tolerance on the aperture die-cut, and what is the rejection threshold for inlay fitment failures during your in-line QC process?
- If digital content substitution (QR, NFC, AR) is part of the module design: what minimum print contrast ratio and quiet zone dimension are guaranteed by your print process, and is that specification verified against ISO 15415 print quality grading at goods-out?
Quality Verification Checklist #
Quality acceptance criteria for incoming samples or production batches:
- [ ] Base module dieline dimensions confirmed within ±0.5mm of approved structural drawing across a minimum 5-unit sample measurement
- [ ] Label/inlay sub-module adhesive peel strength ≥3.0 N/25mm (per ASTM D3330 or equivalent), tested on production substrate under 23°C/50% RH conditions
- [ ] Blank zone registration on graphic-universal template confirmed within ±0.5mm of nominal position under normal production run conditions (not just press-pass samples)
- [ ] Structural inlay fitment test: inlay card seats flush within aperture with no visible gap >0.3mm on any edge across 10 consecutive units
- [ ] Hang tag or auxiliary component attachment method confirmed to withstand ≥5N pull force without detachment or substrate tear
- [ ] QR code print quality graded Grade C or better per ISO 15415 on production samples (not just pre-press proofs)
- [ ] Material specification confirmed via supplier mill certificate — board grade, caliper, and GSM within ±5% of approved specification
- [ ] Transit performance: outer carton base module passes ISTA 2A drop and vibration sequence without delamination or structural failure
Key Specifications Table #
| Parameter | Recommended Value | Verification Method |
|---|---|---|
| Sub-module blank zone registration tolerance | ±0.5 mm | Optical measurement against registered datum points on 5-unit sample |
| Label/inlay peel adhesion (adhesive application method) | ≥3.0 N/25 mm | ASTM D3330 peel test at 23°C / 50% RH on production substrate |
| Structural inlay aperture fitment gap | ≤0.3 mm on any edge | Physical gauge measurement, 10 consecutive production units |
| Hang tag / auxiliary component pull resistance | ≥5 N without detachment | Tensile pull test on finished assembly |
| QR code print quality grade | Grade C or better | ISO 15415 barcode print quality assessment on production sample |
| Board caliper / GSM tolerance | ±5% of specification | Mill certificate cross-checked against incoming goods measurement |
Looking for a manufacturer that meets these specs? Get a free sample — MOQ starts at 500 units.
References #
Data source: Modular Generic Packaging Design Strategies for Small-Batch Personalized Customization in the Consumer Goods Sector, L. Yang et al., Journal of Applied Polymer Science, 2024
Frequently Asked Questions #
What is the practical minimum order quantity for a modular universal packaging program?
For graphic-universal (label-only customization on a shared base box), effective MOQ per variant can be as low as 100–200 units because the base structure is produced in a single longer run and stored as blank stock. For structural-universal with unique sub-module tooling, you’re typically looking at 500 units minimum per module type to amortize the die investment — though digital-printed sub-modules (labels, inlay cards) can run at 50–100 units. The overall program MOQ depends on how many base module sets you’re ordering, not on how many variants you need.
Can I use the module replacement method with my existing packaging tooling?
Only if your existing dieline includes pre-designed blank zones or aperture features. Retrofitting a conventional package design to accept modular inlays almost always requires a dieline revision and a new cutting die — at which point you might as well start from a modularity-first brief. The blank zone placement has to be decided at the structural design stage to align with cost-efficient cut lines. Don’t try to add modularity after the tooling is cut.
What substrates work best for the direct adhesive label sub-module?
Field evaluations consistently show that coated art paper (matte or gloss, 80–120gsm) and PET film (50–75 micron) give the most reliable adhesion and print quality combination for brand logo labels applied to folding carton surfaces. Laser holographic (mirror) substrates add visual impact for premium tiers but require adhesive reformulation for adequate bond strength on textured or UV-coated base surfaces — confirm adhesive chemistry compatibility before finalizing the spec.
How does digital content substitution (AR/QR) affect print complexity and cost?
The print itself — a QR code or NFC antenna embedding — adds minimal marginal cost. The cost is in the content management infrastructure on the brand side, not in manufacturing. What does add manufacturing cost is if the QR trigger needs to be serialized (unique per unit) rather than static — that requires variable data printing capability, which not all flexo or offset suppliers offer inline. Verify your supplier’s VDP capability and minimum run size for serialized output before including it in your specification.
What is the biggest mistake buyers make when briefing a modular packaging program?
Specifying variants before specifying the platform. Buyers come in with a list of 12 SKU variations and ask the supplier to price each one individually — which guarantees they pay full tooling and setup on every variant. The correct brief sequence is: define the base module set, specify the sub-module interface dimensions, then define the variant matrix. That sequence is what allows a supplier to quote shared tooling amortization and give you an accurate cost-per-variant at low MOQ. See our OEM process documentation and MOQ, costing and pricing guides for brief templates that follow this structure.
Published by ukugi.com Technical Team | Request a quote


